
If you updated your Java version, or Java was automatically updated in the background, you will need to tell Yellowfin where to find the latest version. It is important to take note that Java changes the installation directory with every update (the version number is included in the install path) and Yellowfin points to this directory on your server.
I recommend that you disable Java’s automatic updates, especially on a production server – you don’t want the users to receive an error when trying to access Yellowfin. This will allow you to plan and schedule your updates.
Find the steps below for updating Yellowfin with your new Java path.
Determine the new Java path.
In windows the default is: C:\Program Files\Java\jdk1.8.0_161 (the version numbers will be different), but you can also determine the path by going to the Java Control Panel. This can be accessed by launching the Windows Start menu, find the Java program listing and click on Configure Java to launch the Java control panel.
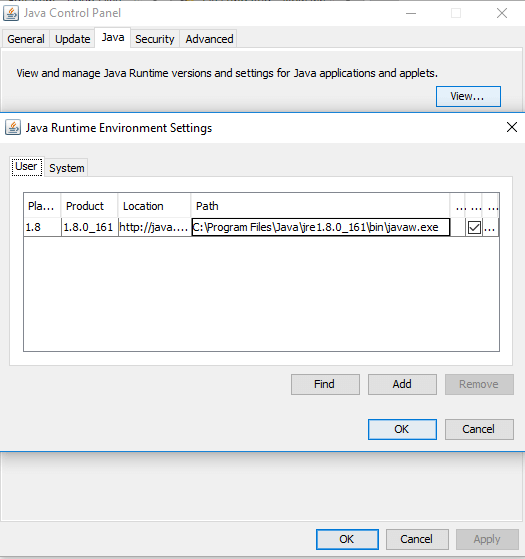
In the panel that shows up, you can find the path as demonstrated in the screenshot below. In the Java Control Panel, go to the 'Java' tab and then click the 'View' button under the description 'View and manage Java Runtime versions and settings for Java applications and applets.'
You can also turn off automatic updates using the ‘Update’ tab in the Java Control panel.
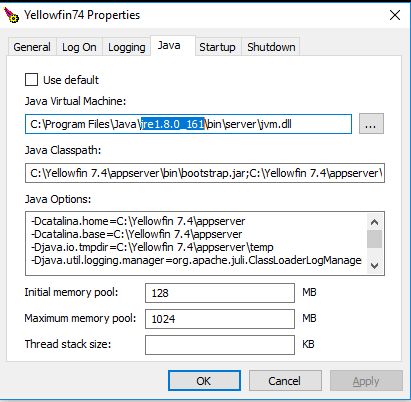
Locate the “JRE_HOME” variable in the "catalina.bat" file located in your "[Yellowfin Installation directory]/appserver/bin" directory and replace the current value with your new Java path.

If you are starting Yellowfin manually via the “startup.bat” file you are done and can skip the next steps.
If you run Yellowfin as a Windows Service, you still need to complete the following steps:
Open the command prompt and navigate to your "[Yellowfin Installation directory]/appserver/bin" directory.
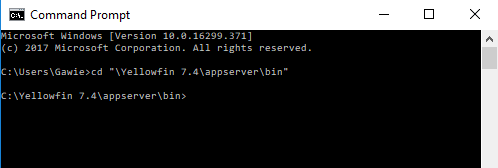
Enter the following command and press enter:
"tomcat8w.exe //ES//Yellowfin"
Note: The version of tomcat may differ depending on the version of Yellowfin you are running, for example tomcat6w or tomcat7w.
Yellowfin should now start successfully.